Manage contacts
This article covers the day-to-day operations you carry out on your contact base in Reepli: adding, viewing, editing, labeling, and deleting. Everything happens in the Contacts section of the dashboard.
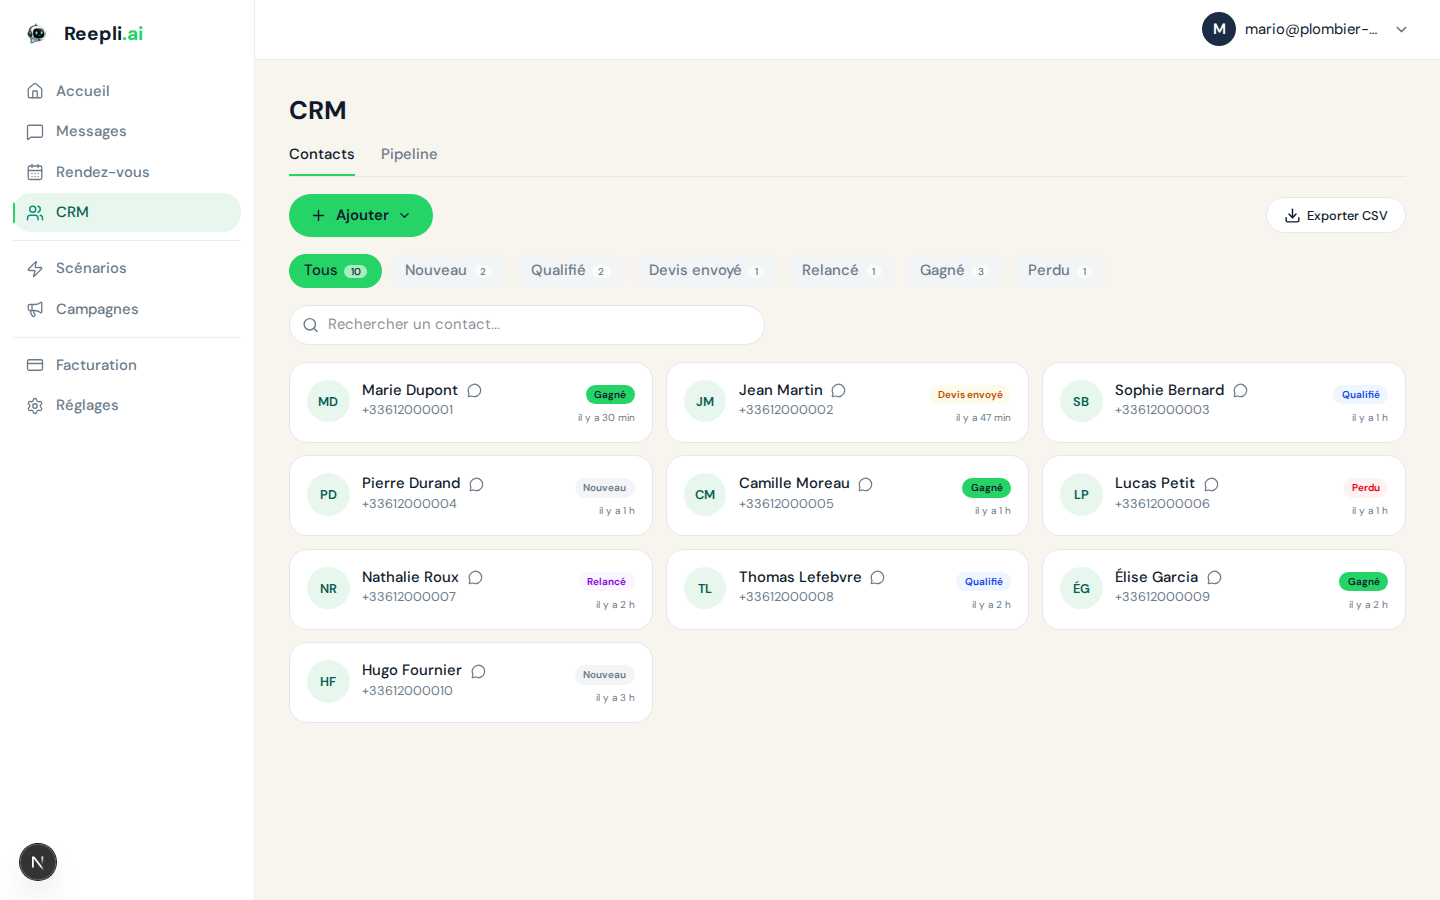
Available views
Three ways to look at your base:
| View | When to use it |
|---|---|
| List | The default view. Sortable, filterable, exportable. Ideal for deep work or a precise search. |
| Kanban | One column per pipeline stage (New, Qualified, Quote sent, Followed up, Won, Lost). Ideal for managing sales day to day. |
| Contact record | The full detail of a single contact — history, notes, labels, conversation. |
Switch between List and Kanban via the selector in the top right of the Contacts page.
Add a contact
Automatic creation on the first message
In most cases, you have nothing to do: as soon as an unknown number writes to you on WhatsApp, Reepli creates the record and starts the conversation. The record is then initialized with:
- The phone number, taken from the message received.
- The name, taken from the WhatsApp profile if the contact set one up on their phone, otherwise left blank.
- The stage set to New.
- The lead score at 0.
You can then fill in the other fields as the conversation goes on.
Manual creation
If you want to create a record before a contact has written to you (for example, to prepare an outbound send):
- Click New contact in the top right of the Contacts page.
- Enter the number in international format (
+33612345678). - Optionally fill in name, email, labels.
- Confirm.
The number must be in international format with + and country code. Reepli rejects local numbers without a prefix.
Bulk add
To import a list, use CSV or vCard import.
View a record
Open the record
Click the contact's row in the list, or their card in the Kanban. The record opens.
Record structure
| Section | Content |
|---|---|
| Header | Name, number, contact stage, score, labels |
| Conversation | The full WhatsApp thread, ordered chronologically |
| AI summary | The AI-generated customer summary, regenerated periodically |
| Notes | Internal notes added by your team |
| History | All stage transitions, manual changes, activities |
Conversation panel
When you open a conversation from the Inbox, the right side panel shows a condensed summary of the same record: name, stage, score, labels, latest note. Handy for replying quickly without switching tabs.
Edit a contact
Individual edit
- Open the record.
- Click the field to edit.
- Enter the new value. The change is saved automatically.
Editable fields:
- Name
- Contact stage (via dropdown or drag-and-drop in the Kanban)
- Labels (add/remove)
- Internal notes
Fields that cannot be edited manually:
- The phone number (unique identifier).
- The lead score and the customer summary (calculated by the AI).
- The date of the last customer message and the follow-up counter (updated automatically).
Bulk edit
From the filtered list:
- Check several contacts (or check the "Select all" box).
- Click Bulk actions in the bar that appears.
- Choose the action: add a label, remove a label, change the stage, delete.
- Confirm.
Labels
Labels are your free-form classification tools. They are described in detail in Contact record fields.
Add a label
On the record, in the Labels section, type the name (existing or new) and confirm.
Remove a label
Click the cross next to the label on the record.
Filter by label
In the list, open Filters and select one or more labels. See Filters and targeting for the details.
Internal notes
Notes let you share context with yourself or your team — without sending anything to the contact.
- Open the record, Notes tab.
- Click Add a note.
- Write it and save.
Each note shows the author and date. Notes stay attached to the record as long as it exists.
Delete a contact
Individual deletion
- Open the record.
- Click the ⋯ menu in the top right.
- Select Delete contact.
- Confirm.
Bulk deletion
From the list: check the contacts → Bulk actions → Delete → confirm.
Deletion is irreversible. The record, its notes, and its customer summary are erased. The message history remains viewable but becomes orphaned (with no associated contact). If the contact writes to you again afterward, a new record is created.
Alternative: move to Lost
Rather than deleting, switch the stage to Lost. The record stays viewable, the history is preserved, and you can always find the contact again in the Lost column of the Kanban if they come back.
Quick search
The search bar at the top of the list searches simultaneously across:
- The name
- The phone number
- The email
It is case- and accent-insensitive ("Marie" finds "Mârié").
Sorting and columns
Sorting
Click a column header to sort the list. Available sorts:
- Name (A → Z or Z → A)
- Creation date (recent → old or vice versa)
- Last activity
- Score
Displayed columns
By default, Reepli shows: name, contact stage, score, last activity, labels. This selection is fixed — there is no user customization of columns for now.
Best practices
- Work in Kanban for the pipeline, in List for searching — each view is optimized for a different use case. Avoid scrolling through a list of 5,000 contacts to track the pipeline; use the Kanban.
- Note the important things — the AI summary is useful but condensed. Specific commitments ("asked for a callback on Thursday"), sensitive info, and contractual details should go into a note.
- Avoid hasty deletions — a Lost contact can become New again six months later. Permanent deletion makes you lose all of the history.
- Update the stage right away — when a customer confirms an order, move the record to Won immediately. That's what feeds your statistics and your Kanban.
Related articles
- CRM overview
- Lead CRM pipeline
- Contact record fields
- Filters and contact targeting
- Import and export
For any question about managing contacts, contact support via the chat at the bottom right of the app or by email at [email protected].